Image Annotation Tips for Better Communication
Master the art of image annotation. Use arrows, text, shapes, and blur tools to communicate your ideas clearly in screenshots and photos.
Annotations turn a screenshot into an explanation. Arrows, boxes, text labels, and blur help you point out exactly what changed, where a problem is, or what someone should look at next. Used well, they make bug reports clearer, design feedback more precise, and tutorials easier to follow.
When to Use Annotations
Annotations are most useful when a screenshot alone would be ambiguous:
- Bug reports: circle the broken element and describe the expected behavior.
- Design reviews: call out spacing, contrast, or layout issues.
- Documentation: highlight the button or setting being described.
- Teaching: draw attention to the important part of a complex screen.
Choosing the Right Annotation Tools
Most annotation tools provide the same basic elements. The key is knowing when to use each one.
| Tool | Best for |
|---|---|
| Arrow | Showing direction or pointing to a specific element |
| Rectangle / circle | Highlighting an area without obscuring it |
| Text | Adding a short explanation or label |
| Brush | Freehand notes, but easy to overuse |
| Blur / mosaic | Hiding sensitive information such as names, keys, or addresses |
A good rule is to use the simplest tool that communicates the point. Too many arrows and colors make the image harder to read.
How to Annotate an Image with PictKit
- Open the image annotator and upload a screenshot.
- Select a tool from the sidebar: arrow, rectangle, text, brush, or mosaic.
- Adjust the color and size so the annotation is visible but not overpowering.
- Add text labels with short, specific wording.
- Blur any sensitive information before exporting.
- Download the annotated image in PNG or JPEG.
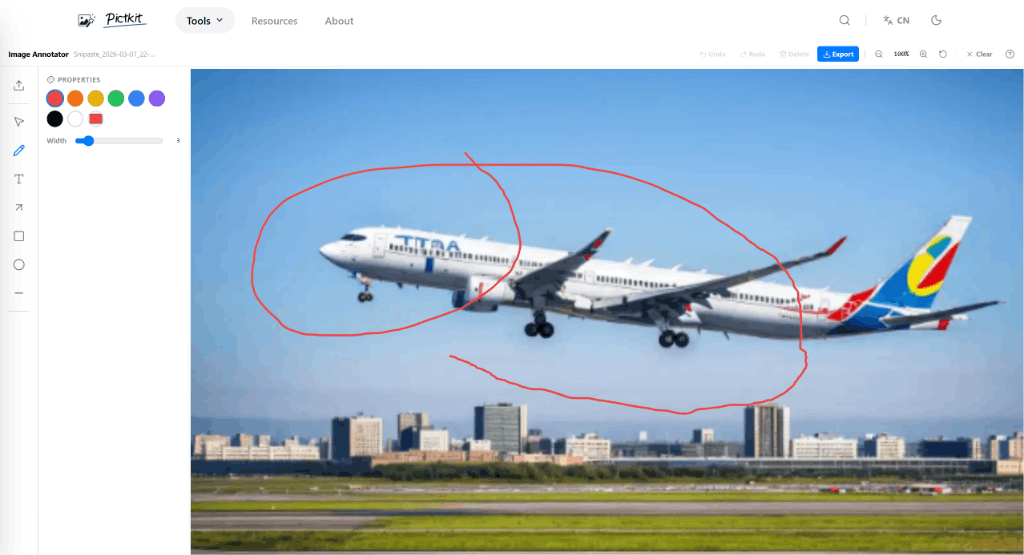
Because the annotation is kept on a separate layer, you can move, resize, or delete marks before exporting. This makes it easy to correct mistakes without starting over.
Best Practices for Clear Annotations
- Use one accent color: red or blue is usually enough.
- Keep labels short: a label such as "Overlap" is clearer than a paragraph.
- Place arrows consistently: point to the exact edge of the element you mean.
- Blur before sharing: hide emails, tokens, addresses, and personal data first.
- Add context in the message: the annotation marks the location; the message explains the issue.
Protecting Sensitive Information
Screenshots often contain data that should not be shared. Before exporting:
- Review the image for emails, usernames, tokens, or addresses.
- Apply mosaic or blur over those areas.
- Confirm the blurred area is large enough to hide the content.
Processing locally in the browser means the screenshot never needs to be uploaded to a server.
FAQ
What format should I export? PNG is best for screenshots with text and sharp edges. JPEG is acceptable when file size matters and there is little text.
Can I edit an annotation after drawing it? Yes. PictKit keeps annotations as separate objects, so you can select, move, resize, and change their color before export.
How do I make an arrow point precisely? Zoom into the screenshot before placing the arrow, then position it close to the element. A short arrow is usually more precise than a long one.
Do I need to annotate every screenshot? No. Annotate only when it saves the reader time. A clean screenshot with a short caption is often enough.